PhotoSeek creator Tom Dempsey reveals his favorite photographic gear.
For travel and nature photography, I look for portable, high-quality cameras on a moderate budget. By not being tied to any one brand, I regularly upgrade to the latest, best tool for the job. Former gear is easily sold locally via Craigslist.org, in-person for cash.
Equipment Summary
Since 2016, my 1-inch-sensor Sony RX10 IV and III cameras have preserved publishable image quality while radically extending optical zoom range to 25x power. Back in 2012-2016, I enjoyed the 24-megapixel (MP) APS-C sensor in Sony A6300 and predecessor NEX-7 using Sony’s 18-200mm SteadyShot lens (27-300mm equivalent). Before that, Nikon gear served beautifully over 11 years, including Nikon D5000 APS-C with 18-200mm VR II lens. I refined my craft in 1978−97 with the classic Olympus OM-1N 35mm-film camera. But switching to digital Canon PowerShot cameras from 2003-07 rejuvenated my work with instant feedback and more freedom from the tripod. My online portfolio includes images from 1981-present. – Tom Dempsey
See my latest recommendations: BEST TRAVEL CAMERAS REVIEW.
Below, buy linked items at Amazon.com to support Tom’s work.
Tom’s Camera History 1978-present
Since 1978 I have regularly updated my technology as follows (newest at top, oldest at bottom).
Current main camera: Sony Cyber-shot DSC-RX10 IV (37 oz; Tom’s usage 2018-present)
[slower-focusing previous version RX10 III used from May 2016−2017]
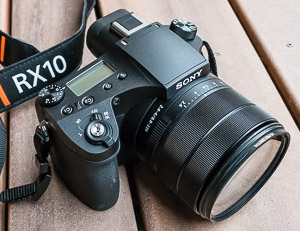
Read my review of Sony RX10 IV/RX10M4, the ultimate travel camera. I acquired Sony Cyber-shot DSC-RX10 III (Amazon) when first released in May 2016 (read my review of version III). Upgrading to Sony RX10 IV (buy at Amazon) in 2018 bought faster autofocus, touchscreen AF, and reorganized menus. Both III and IV are just 37 ounces with battery and card (or 42 oz including the 5 ounces for strap, lens filter, cap & hood). Its “sealed body” keeps out dust and has a bright f/2.4-4 lens with vast 25x zoom, sharp throughout its remarkable 24-600mm equivalent range. I no longer need a pocket camera for improving close-focus shots, as RX10’s 1″-Type sensor has a depth of focus much deeper than APS-C sensor cameras for a given f-stop, enhancing details all the way from close flower shots, to distant bird feathers, to 600mm-equivalent telephoto. RX10 IV is the world’s most versatile camera for on-the-go photographers.
TIP: Despite Sony’s claim of “dust and moisture-resistant” body, DON’T EXPOSE YOUR RX10 IV or III CAMERA TO RAIN (even if immediately wiped off), as wind-driven droplets killed my RX10 III. Despite its weather sealing effectively keeping dust and condensation out of the lens throughout 16 months, one fateful rainstorm short-circuited its focus and LCD (sadly outside of its 1-year Sony Warranty). Rather than risking an estimated $656 repair (whose 90-day guarantee is voided by “liquid damage”), I bought a new European RX10 III (in York, England, to complete my UK photo shoot) which I soon sold on Craigslist in Seattle, after upgrading to the superior RX10 IV.

Indoor event photography / night photography camera: Sony Alpha A6300 (18 oz with kit lens, or 25 oz with sharper 16-70mm F4 lens; Tom’s usage from April 2016−present)
Introduced in April 2016, the best value camera for capturing indoor events or action with fast autofocus is my Sony Alpha A6300 (2016, 14 oz body + 4 oz 24-75mm equiv zoom) (buy at Amazon with 16-50mm f/3.5-5.6 OSS kit lens). To try to beat my RX10M3, I sold A6300’s inferior kit lens and upgraded to a pricier, sharper Sony Vario-Tessar T* E-mount 16-70mm F4 ZA OSS 4x-zoom lens
(11 oz, SEL1670Z, 2013), which slightly beats Sony SELP18105G and SEL-18200 from 18-70mm. But the sharp, versatile Sony RX10 IV has nearly antiquated my A6300 (which is only 0-5% sharper).
Sony’s A6300 (read my review) demands the sharpest E-mount lenses to leverage its APS-C sensor, in order to rival the marvelous optics of Sony RX10 IV or III. For indoor events using the A6300, my older Sony SEL18200 lens struggled to keep up with RX10 III or IV outside of a 30-60mm equivalent sweet spot. Improved autofocus on RX10 IV now means I tend to leave the A6300 at home to reduce luggage when flying abroad, except on professional shoots where I need a top camera for backup, indoor events and sharper night photos.
Tom’s pocketsize backup and backpacking camera: (11 oz; usage from Aug 2018−present)
- Tom’s Sony Cyber-shot DSC-RX100 VI / RX100M6 (2018, 11 oz, 24–200mm f/2.8-4.5) captures nearly the same image quality as his larger main camera through 8x zoom. Read my RX100M6 review. (In August 2019, Sony upgraded it to the faster-focusing RX100M7, which reigns as the world’s best pocketable zoom camera as of 2021.)
- For less than half the price, image quality is nearly as good with my earlier Panasonic Lumix DSC-ZS100 (2016, 11 oz, 25-250mm equivalent lens f/2.8-5.9). Read my ZS100 review.

Tom’s smartphone cameras (usage from 2015-present)
- Tom used since 2023: Samsung Galaxy S23 Ultra (unlocked) with 256GB storage, adds an excellent 10x optical zoom camera! Handy stylus. Weight = 8.25 oz, plus screen protector and case. Waterproof rating IP68 (withstands dust, dirt, sand, and submersion up to a depth of 1.5m underwater for up to thirty minutes).
- Tom used 2022-23: Samsung Galaxy S22 Ultra (unlocked) with 256GB storage, adds an excellent 10x optical zoom camera! Handy stylus. Weight = 8.1 oz, plus screen protector and case. Waterproof rating IP68 (withstands dust, dirt, sand, and submersion up to a depth of 1.5m underwater for up to thirty minutes).
- Tom used 2019-2022: Samsung Galaxy Note9 with 512GB storage, handy stylus (7.1 oz): improves the camera and extends battery. Waterproof rating IP68.
- Tom used 2015-2018: Samsung Galaxy Note5 with stylus (6 oz, plus screen protector and case)
Tom’s underwater camera: Olympus TG-4 (8.7 oz, 25-100mm equiv; usage from 2017−present)
- Underwater, shockproof, dust-resistant Olympus Tough TG-4 (2015, 8.7 oz, 25-100mm equiv) compromises image quality but is good for underwater movies. Note: in 2022 Olympus rebranded as OM System.
- Lightweight alternative: CaliCase Universal Waterproof Case lets you operate your smartphone when hiking in the rain or swimming underwater! For a top camera, consider Samsung Galaxy, Google Pixel, or Apple iPhone.
Tom’s Printer (usage from 2022-present): Canon PIXMA TR8620 Multi-function Printer
Best value printers for photographers as of 2021:
- Excellent value 8.5-inch-wide multi-function printer for photographers: Canon PIXMA TR8620 Printer, with five ink colors including pigmented black, accepting paper from small media up to Legal 8.5×14-inches. The elegant little TR8620 prints onto Canon Pro Luster Paper just as vibrantly as did Tom’s earlier printer, Epson Stylus Photo 2200 onto Epson Premium Luster.
- Adding photo blue ink in the following model achieves slightly better color accuracy, but it’s hardly perceptible and costs more for ink usage: Canon PIXMA TS8320 combines a pigment-based black ink with dye-based cyan, magenta, yellow, “photo black” and photo blue inks.
- Excellent 13-inch-wide printer for photographers: Canon imagePROGRAF PRO-300 printer, with ten pigmented inks.
Tom’s previous printer (usage from 2005-2021): Epson Stylus Photo 2200
- The 2200 printer and its inks are no longer sold. The 2200 made impressive prints (equal to or better than the typical chemical photographic process) up to 13 x 44 inches, rated at 80-year longevity on special Epson papers (when mounted behind glass).
- Features: 7-color Ultrachrome inks, high quality ink jet printer. Combination of Photo Black (or Matte Black) and Light Black improves neutral and Black & White tones, and extends the dynamic range of prints. [I upgraded to the 2200 from the earlier but excellent Epson Stylus Photo 1270, for which ink costs about 25% less.]
- Epson later upgraded as follows:
- The 8-color Epson Stylus Photo 2400 prints on paper up to 13 x 44 inches and improves gray scale and dynamic range for blacks & shadows (essential for Black & White prints), using long lasting K3 inks, superior to the Epson 2200 or 1270/1280.
- The 8-color Epson Stylus Photo 3800 Printer (released 2007) prints on paper 17×22 inches using long lasting K3 inks. The 3800 takes up a surprisingly small footprint on your office desktop.
Tom’s latest computer and software (A, B, C, D, E)
A. Adobe Lightroom Classic for Windows (Tom’s usage from 2007−present)
Tom highly recommends the Adobe Photography Plan (Lightroom Classic + LR cloud version + Photoshop) which elegantly organizes images and speeds editing! Lightroom easily and automatically exports image files to attractive web pages, or to files of any size, such as for e-mail or Microsoft PowerPoint presentations. I exclusively use the computer desktop version called “Lightroom Classic (LRC)”. LRC has more-powerful features than the cloud version “Lightroom (LR)” — though both have all the editing tools I need.
As of 2023, I subscribe to Adobe’s “20GB Photography Plan” which includes Lightroom Classic (LRC). I use LRC to organize and edit 5TB (terabytes) of photos stored on my local PC — too large for the Cloud. About 2% of my edits require Photoshop, also included. My wife separately subscribes to the “1TB Photography Plan” in order to manage her 400-GB (gigabyte) collection entirely stored in the Adobe Cloud, using the simpler cloud version of the Lightroom (LR) program, plus occasionally Photoshop.
Lightroom history: from 2017 backwards, versions 7.1–1.1
- Major improvement in 2017, CC Lightroom version 7.1: the Auto adjust button now works so well that I may use it every time, for huge savings on editing time! Apply it upon Import as a “Develop Settings > User Preset > (created previously with ‘Auto Settings’ checked)”. This new Sensei powered “Auto” uses artificial intelligence to adjust the most important Develop settings for Exposure, Contrast, Highlights, Shadows, Whites, Blacks, Vibrance, and Saturation.
- If you have photos that were previously edited in a much older version of Lightroom, be sure to select them all and use “Develop module > Settings > Update to Current Process” to make available the latest editing capabilities for Auto, Shadows, Highlights, Adjustment Brush, etc.
- New in 2016, Lightroom CC’s Boundary Warp feature is essential for building panoramas quickly, and Dehaze (in Adjustment Brush and Develop>Effects tab) provides a big help beyond Clarity to reveal details behind hazy skies, glare, or other conditions. (Not supported in LR version 6.)
- Lightroom bug sorting videos: To properly sort videos by Capture Date, put them in folders separate from still files, or else the movies will appear in unexpected order. Reported workaround: Select all the videos; then Metadata > Edit Capture Time; then click OK (without needing to edit each one).
- In April 2015, Lightroom version 6 added Photo Merge to Panorama and to HDR, with raw file input and high-quality output to Adobe Digital Negative DNG files.
- Save money on Adobe products using your discount for academic/student/teacher, if applicable. In 2012, Adobe cut in half the retail price of Lightroom.
- Lightroom helped me edit and organize 2-3 times more per week compared to Canon ZoomBrowser, or to Adobe Photoshop with Bridge.
- Lightroom smartly stores its non-destructive editing commands & labels in a powerful database (and in .XMP sidecar files for raw), compatible with JPG, TIF, and most camera raw files.
- To protect your edits and metadata changes against the rare event of a damaged Lightroom catalog, be sure to “Automatically write changes into XMP” (which unfortunately isn’t the default) set under Lightroom’s Edit menu > Catalog Settings > Metadata.
- But backing up DNG file edits must be done manually, with the command “Update DNG Preview and Metadata” under Metadata menu. DNG is advantageously compressed 20% smaller than camera raw, but using sidecar+raw instead may be faster and more secure against file corruption. The writing time for a whole DNG file takes much longer than a quick write to a tiny sidecar XMP file. So long as you “Build Previews 1:1” at Import time as I do, Lightroom preview speeds should be similar or better using raw+sidecar compared to DNG. Synchronizing a folder of thousands of images should be much quicker with raw+sidecar than with DNG.
- I don’t see an advantage in converting old or importing new raw shots to DNG. As of 2015, Adobe Lightroom version 6 still handles my oldest raw files from Canon Powershot G5 camera of 2003 and Sony NEX 7 raw (2012-15).
- To simplify your workflow and printing, use sRGB color space outside of Lightroom (Edit>Preferences>External Editing tab), such as when launching Photoshop. Costco makes great 40-year prints on Fuji Crystal Archive Paper using default sRGB color space at 300 dpi. Most monitors and cameras use sRGB color space as a default practical standard.
- A great Lightroom upgrade from 1.4 to 2.0 added graduated filters, localized editing brushes, and a quicker interface to Adobe Photoshop such as for Photomerge (stitching panoramas, now included in Lightroom version 6.x). If you buy a new camera that captures raw files, check if the latest Lightroom update has added support for it. (For example, Lightroom Version 1.1 introduced RAW support for Nikon D40X camera, 1.4 added Nikon D60, 2.4 added Nikon D5000.)
- Adobe Lightroom ties you to the expense of updates, or ongoing CC subscription, required for raw file compatibility for future cameras that you may purchase. If your Lightroom CC subscription expires, you can still view, organize and export (but not Develop) images.
FREE editor alternatives:
-
- Google’s free Snapseed app for iOS, MacOS, Android, and Windows: is surprisingly advanced yet easy-to-use, including adjustment brushes
- Apple Photos is free with your Apple device and easy to use. It sadly lacks an adjustment brush, which luckily is found in Google’s free Snapseed app (for iOS, MacOS, Android, Windows), which dovetails well. [History: In 2014, Apple ceased development of its Aperture and iPhoto apps, replacing both with “Photos for macOS.” Version 3 and later of both Apple Aperture and Adobe Lightroom helpfully cataloged movie files.]
- Google Photos: good across multiple platforms but requires internet connection. 16mp max per photo. 15GB free storage on Google Drive (then $2/month per 100GB up to 30TB as of 2017).
- Polarr.co edits very well, especially the $20 Pro version with important Brush Mask and batch processing. But Polarr loads only 50 images at a time, and requires external organizing software. Polarr image size must be ≤40 megapixels (so you must edit the entire set of images before using a stitcher to merge a large panorama.
- FastStone Image Viewer 3.6 Freeware, www.faststone.org. Fast and capable, especially if you use raw files. Downloads, views, edits and exports still images, including most camera raw files. FastStone does not view or download movies or sound files.
- Canon Zoombrowser is FREE with purchase of Canon cameras. Handily downloads, views, edits and exports Canon still images, movies and recorded sound files. (Simpler than FastStone Viewer.)

A Japanese maple turns orange in autumn. The Seattle Japanese Garden was completed in 1960 within UW’s Washington Park Arboretum, Seattle, Washington, USA. (Shot at 33mm equivalent on Sony NEX-7 with Sony E-Mount 18-200mm f3.5-6.3 OSS lens © Tom Dempsey)
B. Adobe Photoshop
While Adobe Lightroom handles 95% of my editing, the remaining 5% of my very best images, printing, and book production still require Photoshop. Most people don’t need Photoshop, since Adobe Lightroom covers most advanced photo editing needs.
Photoshop and Lightroom history
- After Spring 2013, Photoshop version CS6 and later was rented by the month or paid yearly to run the CC version, which could expire if you didn’t revalidate every 6 months through Adobe Creative Cloud via internet connection. (In contrast, Adobe Lightroom Classic was cheaper and never expired, although raw file support for new cameras requires regular upgrades.)
- dobe upgraded to CS5.5 in 2011, to CS5 in Fall 2009, to CS4 in Fall 2008. Photoshop version CS5 worked well for me. CS5 through CS3 have support for 16-bit Adjustment Layers and greatly improved Photomerge, to seamlessly stitch 16-bit panoramas from multiple 16-bit images (antiquated by Lightroom 6.x and CC with Photomerge).
C. Microsoft Powerpoint 2016 for Windows, via Office 365 Home subscription
makes flexible photo shows combining images, music, videos, labels & charts with nice cross-fades between frames for display on a computer or digital projector. Subscribing to Microsoft Office 365 Home includes PowerPoint, Word, Excel, and Outlook; supports 5 PCs or Macs, 5 tablets, and 5 phones; has unlimited customer service; and is cheaper than buying standalone copies separately for PC and laptop.
Alternative show software: Proshow Producer has flexible output formats at all resolutions.
D. Tom’s laptop shows use Microsoft PowerPoint on a PROJECTOR or HD TV
- 60-inch Samsung digital HD TV monitor with LED Backlight (Tom’s usage 2012 – present): As of October 2012, our living room shows are upgraded with a spectacular 60-inch Samsung digital TV with LED Backlight technology, 1920 x 1080 pixels, displaying photographs with excellent tonal impact and realism. Impressive full-array backlight LED LCD television technology with local dimming has noticeably deeper blacks and greater dynamic range than edge-lit LED LCD and is worth the slightly thicker box. Mount on the wall to save floor space. LED LCD televisions use half the power of bulky old CRT (Cathode Ray Tube) models. Connect the large digital television via HDMI socket to a laptop computer. Darkening the room is no longer necessary because LED televisions make presentations brighter than projectors (such as Canon Realis SX60 or SX50).
- Best projector under $1000: BenQ HT2050 DLP HD 1080p Projector (at Amazon.com) – 3D Home Theater Projector with All-Glass Cinema Grade Lens. Or older, slightly cheaper BenQ HT1075 is almost as good.
My older Canon Realis SX50 digital projector (Tom’s usage December 2005 – present) displays impressive multimedia presentations using Microsoft Powerpoint run on a notebook computer, dynamically superior to a slide film projector. The SX50 projects a spectacular movie theater experience, especially with a 6-speaker Surround Sound system. The Canon Realis SX50 projector features SXGA+ (1400 by 1050 pixels); great 1000 to 1 contrast; 2000 actual lumens; true 720p HD broadcast for movies. $4000 in December 2005, then price dropped to $3500 in October 2006. It has keystone correction, a great dynamic range (from highlights to shadows), and sharper focus than slide film projectors such as the Kodak Carousel 4600. The SX50 is well optimized to show images in default sRGB mode, as captured by digital cameras.
On my trusty old Kodak Carousel 4600 film projector, the contrast ratio is more limited, requiring a darker room than Canon SX50; and you must wait for the curved film in each slide mount to warm up and pop into focus, which still annoyingly leaves the edges or center out of focus, even with the compensating lens and autofocus. In contrast, digital projectors focus crisply & brightly across the entire image!
E. Tom’s computer hardware
Tom’s current Personal Computer system (from 2017−present):
- Puget Systems Serenity Professional, custom-built with:
32GB Crucial DDR4-2133 RAM;
Intel Quad Core i7-7700K CPU 4.2 GHz 8MB 91W;
booting from 2TB SSD hard drive Samsung 850 EVO SATA 6GB/s;
master photo storage on 2 x Western Digital Gold 6TB SATA hard drives 6gb/second (set up mirrored as RAID 1 for secure instant backup);
Nvidia EVGA GeForce GTX 1070 8GB ACX 3.0 video card;
ASUS Prime Z270-A motherboard with onboard sound and ethernet;
Logitech Wireless Solar Keyboard K750;
64-bit Windows 10 Pro operating system. - LCD monitor: ASUS 32″ 4K Ultra HD ProArt Professional Monitor [PA328Q] IPS 16:9.
- Pioneer Slim External Blu Ray Writer BDR-XD05B (Black) 6x Portable USB 3.0 BD/DVD/CD Burner, works with both my PC and laptop.
Tom’s laptop computer (from 2017−present):
- HP Spectre x360 – 15t Touch Laptop (Product #X6W04AV):
I love its elegant profile, great keyboard & handy touchscreen!
15.6″ 3840×2160 pixels diagonal UHD UWVA eDP BrightView WLED-backlit screen.
Intel Core i7-7500U 2.7-3.5 GHz, 4MB cache, 2 cores,
plus 16GBNVIDIA GeForce 940MX (2GB GDDR5 dedicated) video graphics.
16GB DDR4-2133 SDRAM. 1TB Solid State Drive (SSD).
64-bit Windows 10 Pro operating system. .
Recommended best value PC specifications for Adobe Lightroom & PhotoShop 2012-2013
- Use a 64-bit Windows or Apple operating system (not 32-bit).
- Recommended processor: quad-core 3.5 GHz Intel i7-3770K Ivy Bridge (or i5-3570K saves money)
- Recommended RAM: 12 to 16 gigabytes of Random Access Memory
- Recommended graphics: GeForce GTX570 (note that pricier Quadro 2000 isn’t necessarily better)
- Recommended hard drive: 2 terabytes, 7200 RPM is good enough (or Solid State Drive/SSD, or 10,000 RPM if affordable)
- Recommended: Solid State Drive (SSD): 256GB for PhotoShop swap files
- Recommended: external portable Blu-Ray player, writer/DVD recorder (made optional due to large cheap 16gb memory cards, USB memory sticks, or cloud storage) can be used on both laptop & PC.
- Recommended: USB 3.0 ports
Computer speed tips for older systems 2007-2012
- Install Photoshop, Lightroom program and database onto a RAM drive or SSD for faster speed of loading and running.
- Photoshop sped up when I added a very fast internal hard drive (10,000 rpm) to host the swap file of Adobe Photoshop CS3. Adobe Lightroom versions 1.3 and 1.4 also sped up when “Lightroom Catalog.lrcat” image database was moved onto the fast drive.
- Despite having 4 gigabytes RAM memory on your computer, Photoshop CS3 only takes advantage of one gigabyte of memory before memory starts slowly swapping to disk. Workaround: Upgrade to faster CS4, a 64 bit application.
- My computer 2009-2012 was a Dell XPS 420 Workstation (2.4 GHz Quad-Core processor) with 4 gigabytes RAM memory, running Windows Vista operating system, using the 24 inch Dell 2407WFP-HC Ultrasharp widescreen Flat Panel LCD monitor, 1920 x 1200 pixels, and 1000:1 Contrast Ratio. Main image storage was on a 2 terabyte RAID 0 internal hard-drive pair backed up to 1.5 or 2TB external USB drives. To write to CD/DVDs on my Dell Workstation and Laptop, I had to use the provided Roxio program, instead of Windows XP or Vista (which poorly handle CD/DVD disk writing).
- For external backup or storage, get an external 1 or 2 Terabyte (TB) drive with eSATA or USB 3.0 connection. eSATA is as fast as your internal hard drive connection, much faster than Firewire or USB 2.0. New computers after 2011 may come with fast USB 3.0.
- On your laptop, for more reliable mouse control on your touchpad, disable the annoying Tap feature, which often mistakes your mouse finger movements for a click or double click. Disable Tap in Windows XP or Vista > Control Panel > Mouse > Touchpad. Instead of the Tap feature, rely on the Left and Right buttons.
, Lysefjord, Forsand municipality, Rogaland county, Ryfylke traditional district, Norway, Europe")
Recommended film-to-digital scanners
Compare the value of your many hours spent scanning versus using a service such as Scancafe, which offers reasonably quality, okay resolution for our old 35mm film camera slide quality, sufficient for communicating the colors and memories. But Scancafe severely crops all images to the smaller rectangle fitting within the rounded 4 corners of each slide. This may be a critical problem for your own slides, as it affects many cherished compositions. Maybe ask them not to crop? In my own scanning of selected favorites, I usually take extra time to patch or clone-fill the rounded black corners in Photoshop, thereby retaining the large scanned border areas, preserving the full composition.
- Pacific Image PowerSlide X: Batch scan 50 slides, at up to 10,000 dpi, excellent dynamic range of 4.2, with critically important infrared dust and scratch removal called Magic Touch (a form of ICE). Be sure to immediately start scanning masses of slides to see if you encounter problems. 50 scanned at a time sounds great, though if it jams, try fewer slides at a time. Allow time for preview with manual scan exposure optimization, physical, handling and Photoshop touch up. The scanner outputs good TIF files at 16 bits per channel of R,G,B. It doesn’t capture raw format, so exposure may need manual tweaks to avoid clipping highlights, unless its excellent 4.2 dynamic range sufficiently covers this. My 35mm film shots seem to have at most about 4000dpi worth of detail in them, at which point the film grain and flaws in lens sharpness are very visible! So 10,000 dpi may be overkill, and would take unnecessary extra scanning minutes per slide, so maybe 5000 dpi is sufficient.
- Plustek OpticFilm 8200i SE film scanner
(2014).
-
Epson Perfection V700 Photo Scanner
with Digital ICE™ technology for dust spot removal, scans 12 slides at once in 8×10 inch area. 6400 dpi. Optical density 4.0 Dmax. Compatible with Windows XP and various Macintosh versions.
- Earlier excellent scanner: Epson Perfection 4990 Photo Scanner with Digital ICE™: This flatbed scans up to 8×10 inches, many images at once automatically. 4800 x 9600 dpi resolution, 48-bit color depth, and 4.0 Dmax (dynamic range). Compatible up to Windows XP, and various Macintosh versions.
Tom’s Scanner: Konica Minolta DiMAGE Scan Dual IV (usage from 2006−present)
My discontinued Konica Minolta DiMAGE Scan Dual IV (used 2006−present):
- scans much better than my former Nikon LS-2000 (below), requiring little extra Photoshop adjustment [except for laborious manual dust removal required on 12/16-bit mode scans — where a workaround is to use Photoshop’s Filter>Dust & Scratches feature, but that often reduces image detail].
- If you will be making lots of scans, get a different scanner that supports automatic dust removal using ICE or a similar infrared technology.
- Features: $240 in 2006; 3200dpi, or about 4284 by 2892 pixels from a scanned slide. Dynamic range higher than film, so it captures all shadow & highlight detail. This 3200 dpi resolution sufficiently captures all the clarity in 99% of my images taken on a tripod with consumer-quality SLR lenses. Photoshop can effectively enlarge using a bicubic algorithm. (I feel that 4000 dpi on a different scanner wouldn’t get any more useful information out of 99% of my film slide images). Universal USB connection. Unattended batch scan of 4 slides, each with custom settings. Requires Windows XP (which I run on an old Notebook computer). This Minolta scanner doesn’t work with Windows Vista.
My old Nikon LS-2000 Super Coolscan scanner (Tom’s usage from 2000 – 2005):
- 2700 ppi, makes ~2400×3600 pixels from slides, dynamic range=3.6, $1330 plus $430 stack loader; SCSI interface; can automatically batch scan 30 slides, all at the same setting.
- Using Nikon LS-2000 scanner, I have made prints 28×42 inches at 240dpi, which look good at a viewing distance of about 36 inches or further, scanned from Fujichrome Velvia slides (digitally enlarged from 2400×3600 pixels in two stages in Photoshop).
- By 2003, this Nikon LS-2000 workhorse was antiquated by cheaper, better scanners, but instead of upgrading to the Nikon LS-4000, I bought new digital cameras, which offer more flexibility, higher quality, much faster work flow, and scan subjects directly. The SCSI connection on the Nikon LS-2000 was incompatible with my Dell 9300 Notebook computer. I sold the LS-2000 scanner with stack loader (for $405 on e-Bay), and purchased the above superior Minolta scanner for only $240.
Tom’s Tripod: Slik “Sprint Pro II GM” with built-in quick change plate (usage from 2005−present)
- Slik Sprint Pro II GM Tripod with Ballhead
- Weighs only 33 ounces (or 30 ounces without the center column) and is great for travel, superior to other travel tripods that I’ve evaluated (including Velbon MAXi343E, Manfrotto, or even Gitzo tripods costing three times more). To handle the weight of an SLR with lens weighing heavier than a pound, some photographers may prefer a more substantial change plate. Carry a penny or quarter to tightly screw lock the quick release plate securely to camera. Note that I rarely use a tripod lately due to great image stabilization technology.
- Features: The stiff magnesium alloy legs are sufficiently stable for cameras up to 3 or 4 pounds (especially if you don’t extend the bottom leg section; or if you hang on extra weight) and have very fast locking levers (of sturdy plastic). This tripod rises to eye level (64 inches), collapses to 18 inches (or 16 inches if you remove the quick-release ball head). The metal ball head swings 90 degrees each way, to two vertical positions, and turns freely around, all tightened with one effective lever. Legs can optionally splay out independently in 3 locking positions down to 6.4 inches off the ground. For macro, the center column can be reversed underneath for great shooting flexibility at ground level, and unscrews into a short section (saving 3.3 ounces). (The convertible spike leg tips which I never used are now just rubber in the Pro II, saving a little weight and collecting less soil.) The earlier model “Pro” which I used for 2005-2008 was 3 ounces heavier than the Pro II after adding the superior quick change plate: Slik “Sprint Pro GM” Tripod ($90), with Manfrotto 3299 Quick Change Plate Adapter ($35, quick release), 36 ounces total. Stiff aluminum legs. Leg tips convert from spike (outdoor) to rubber (indoor use) with a simple lockable twist.
Support Tom’s work — buy anything at Amazon.com.
The above products surpass the following older equipment which I no longer use:
Pocketable backup camera: Panasonic Lumix DSC-ZS100 (11 oz; Tom’s usage from 2016−July 2018)
- Panasonic Lumix DSC-ZS100 (buy at Amazon)
- The Panasonic ZS100 (read my review) is more versatile than my 3x zoom Sony RX100 III, which I sold in June 2018.
Pocketable backup camera: Sony RX100 version III (10 oz; Tom’s usage from 2014−2016)
- Sony RX100 (read my review) version III pops up an electronic viewfinder (OLED SVGA 1.44M dots), widens its lens view to 24mm equiv (brightest aperture f/1.8), zooms to a sharper and brighter 70mm f/2.8 telephoto, tilts its 3″ LCD to a full 180 degrees and adds a Nuetral Density (ND) filter, all as substantial upgrades from version II. Sony RX100 (price at Amazon) has an impressive 1-inch-Type sensor (20mp), unusually fast 0.15 sec autofocus, and a sharp LCD (1,228,800 dots). To better grasp its slippery body, add a Sony AG-R2 attachment grip
Sony Alpha NEX-7 with Sony E-Mount 18-200mm lens (33 oz; Tom’s usage July 2012−April 2016)

- Read my full review of Sony NEX-7 versus Nikon D5000 The NEX-7 was upgraded to Sony A6000 camera (at Amazon)
- My Sony Alpha NEX-7 camera
- Sony 18-200mm f3.5-6.3 OSS e-mount SEL18200 silver lens (18.5 oz, 27-300mm equivalent)
- The reasonably sharp 11x zoom lens instantly frames rapidly-changing travel subjects without the extra bulk or annoyance of swapping lenses.
- Multi-coated filters: Tiffen 67mm Digital HT Ultra Clear filter
- Buy extra Wasabi Power NP-FW50 batteries for trekking.
- The Sony 18-200mm lens casts a shadow from 18-50mm using the NEX-7’s pop-up flash, which is fixable by mounting the taller Sony HVL-F20AM Digital Camera Flash
- This Sony 18-200mm SEL18200 silver lens is sharper than the smaller 16-oz Sony SEL-18200LE black version (2012) and sharper than the respected Nikon AF-S DX 18-200mm VR II Zoom lens used on my previous Nikon D5000 camera. A slightly smaller Panasonic HD 14-140mm lens
- I protect NEX-7 on-the-go in a Lowepro Toploader Zoom 50 AW Bag
- Search for more camera bags at Amazon.com: preferably with instant access in front of you for hiking and traveling.
- Sima CapKeeper 2: Never lose your lens cap again! An elastic band slips securely around lens and extends a strong string which is adhered to your lens cap. When you uncap lens and drop the lens cap, the cap hangs from the lens string.
Sony DSC-RX100 version I (8.5 oz; used by Tom in 2013-14, is now my wife’s main camera, replacing Canon G9):
- Sony RX100 camera
- 28-100mm equiv lens, f/1.8-4.9, 20mp, 1-inch sensor, unusually fast hybrid autofocus (0.15 second), sharp LCD.
- Fits nicely in a Tamrac Digital 1 Photo Bag along with extra Wasabi Power NPBX1 batteries.
Tom’s Personal Computer system (from December 2012−2016):
- HP Envy Phoenix H9SE-W8 Desktop PC with: 16GB SDRAM DDR3 1600 MHz, Intel Core i7-3770K CPU 3.5 GHz, 3TB SATA hard drive 7200 RPM plus ExpressCache HP 16GB Disk Cache SSD (for faster startup), 1.5GB Nvidia GeForce GTX 660 graphics card, 600 watt power supply, and 64-bit Windows 8 operating system.
- LCD monitor: 24 inch Dell 2407WFP-HC Ultrasharp widescreen Flat Panel, 1920 x 1200 pixels, and 1000:1 Contrast Ratio.
Canon PowerShot G9 (13 oz) (used by Carol Dempsey July 2009−2014)

- Canon PowerShot G9
- Disadvantages: Grainy at ISO 400 and too noisy at ISO 800+. Workaround: A Canon PowerShot G11
- The newer, smaller Sony DSC-RX100 camera
- G9 is a good 13-ounce camera with quality similar to an 8-megapixel DSLR of 2009 at ISO 80.
- Comparisons: The 28-140mm Canon PowerShot G10 has similar sharpness, making good 5×7 prints at ISO 400, with DIGIC III processor. A Canon A650 IS saves money with similar JPEG quality and adds flip-out LCD but no raw file support.
Nikon D5000 DSLR with Nikkor 18-200mm VR II Lens (45 oz) (Tom used July 2009 − June 2012)
The Nikon D5000 plus Nikon AF-S DX 18-200mm f/3.5-5.6G ED VR II Zoom is one of the best photo systems of 2009 for active travelers, sufficiently lightweight to carry all day in a chest bag.
- 23 ounce body with battery & strap. Mount with 22-ounce Nikon DX 18-200mm VR II Zoom (with cap and hood) with up to 4 stops image-stabilization (up to 8 times slower hand-held shutter speed).
- 12 megapixels 4288 by 2848 pixels, makes good prints to 23 by 30 inches or larger. Excellent quality to ISO 1600, and ISO 3200 is usable for smaller prints. Image quality similar to higher priced Nikon D300. CCD sensor size is Nikon DX format 23.6 x 15.8 mm.
- 2.7 inch tilt and swivel LCD (new, unusual for a DSLR) with rudimentary live view which focuses very slowly, as with all DLSRs through 2010 — focusing through viewfinder is much faster. Captures movies with monophonic sound.
- I protected the camera in a Clik Elite Large SLR Chest Pack
Nikon 18-200mm AF-S ED VR II lens:
- 20 ounces / 560 grams without cap and hood, new in 2006 (with version I of VR Vibration Reduction).
- 18-200mm focal length 11x zoom is perfect for travel (with 27-300mm equivalent field of view in terms of 35mm film). Minimizing lens swapping saves time, reduces dust spots on sensor, and promotes creativity.
- Hand hold shots in up to 4-stops dimmer light using Vibration Reduction (VR). Reduced tripod setup cuts shooting time in half, increasing creativity. Using the image-stabilized lens combined with good image quality on the Nikon D5000 up to ISO 1600 (even ISO 3200 is useful now) improves hand-held photography by about 1-2 stops compared to Nikon D60 (2008) and 6-8 f/stops compared to Canon Powershot Pro1 (2004) which shot noisy images above ISO 100.
- Focuses to 18 inches (0.5 meters) throughout the zoom range. Largest magnification is at 200mm telephoto closeup: 3.5 inches wide (or an area of 93 x 62 mm).
- Filters for Nikkor 18-200mm VR lens:
- Hoya 72mm UV filter both sides coated, in purple box; for important lens protection. “Both sides coated” is cheaper than MultiCoated (Hoya SMC), and should be fine for 95% of your shooting. To avoid flare risk, take off filter if shooting into sun or indoors under spot lights. (My last filter saved my lens by breaking the fall of the lens, camera & tripod which tipped over onto concrete in Luray Caverns!)
- 72mm B+W brand Circular Polarizing filter. Only polarize to remove reflections or haze. In the sky, maximum polarization is a 90 degree angle from the sun, but be careful not to
over darken blue sky. (A cheaper polarizer may throw off your white balance.) - Tiffen P ND .6 Graduated Nuetral Density Filter
- How to optimize lens quality: By being so versatile, this Nikkor 18-200mm VR lens does suffer from some quality compromises, so I sharpen results from 70mm to 200mm by shooting from f/8 to f/11.
- At 135mm, its fuzziest zoom setting, use f/11 to f/16 for sharper results.
- When shooting flash with this 3.9″ lens, shoot above 24mm and remove the lens hood, or else a lens shadow will appear in the bottom of the image. Or mount a high flash on the hotshoe such as Nikon Speedlight SB-600 or 700.
- With VR set ON, I can sharply hand hold shots as slow as 1/8 to 1/30th second for respectively 18mm to 200mm.
- Caveats for the Nikkor VR 18-200mm lens: Architectural photographers (who need straight lines) won’t like the barrel distortion at 18mm wideangle (hard to correct for this lens), or the pincushion distortion between 35mm and 70mm (easily correctable using Adobe Photoshop>Filter>Distort>Lens Correction). Macro photographers should get a sharper dedicated macro lens or use a compact camera which focuses closely with great depth of field.
- Alternative lens: Tamron Di II VC AF 18-270mm F/3.5-6.3 LD Aspherical (IF) MACRO, new in Fall 2008, zooms impressively to 15x, while stabilizing hand-held sharpness close to the image quality of 18-200mm 11x lenses from brands Nikon VR and Canon IS. Tamron 18-270mm costs less than the Nikon 18-200mm lens. But I didn’t like Tamron’s long slippery lens creep when you point the camera up or down, and focus appeared inconsistent in my tests versus the Nikon 18-200mm on a tripod in indoor light. Tamron’s 15x doesn’t help much versus Nikon’s 11x because you can slightly crop Nikon’s sharper 200mm shots and print equally large. Nikon’s focus ring has instant manual focus override, whereas you must
inconveniently flip a switch on the Tamron.
70-300mm F4.5-5.6G ED-IF AF-S VR Zoom Nikkor lens:
- 26 ounces; 5.6″ length; 4.9 foot minimum focus; also compatible with full frame Nikon D3 DSLR.
- For sports, wildlife and birder photographers. According to testing by www.photozone.de, the Nikon 70-300mm captures about 5 to 20% sharper resolution than the Nikon 18-200mm VR.
- This lens proved its worth on our wildlife trip to Galapagos Islands and Ecuador in 2009.
- Unfortunately this 70-300mm lens cannot focus closer than 4.9 feet. For travel, consider carrying the Nikkor 70-300mm VR lens together with kit lens Nikkor 18-55mm 1:3.5-5.6G DX AF-S VR (with good closest macro area 63 x 42 mm), or with the 18-200mm VR II lens (93 x 62mm closest macro area).
Accessories:
- Hoodskins (800-818-3946): Protect your LCD from scratches by applying this clear plastic film, and preserve the resale value of your camera. Hoodskins Model HSK-4 for 3.5- to 4-inch LCD screens can be cut with scissors to fit smaller LCDs.
- Wireless remote control transmitter for shutter release: Nikon ML-L3 ($18) is important for any tripod photography (city lights, fireworks).

Canon PowerShot S95 (8 oz) (Tom used Feb 2011 to Feb 2013)
- Canon PowerShot S95 is half the size and half as sharp as a Canon PowerShot G9. Fits handily in a shirt pocket for people shots. 10 megapixels. 28-105mm equivalent lens, f/2-4.9. 1/1.7″ type sensor (7.44 x 5.58 mm). Good close-focus flower shots with deep depth of field, better than the closest focus of Nikon 18-200mm VR II lens on Nikon D5000.
- Upgrade: Canon PowerShot S110 camera
Nikon D60 & D40X DSLR with Nikkor 18-200mm VR Lens (40 oz total) (Tom used D60 2008−09, D40X 2007−08)
 Island, Galapagos Islands, Ecuador.")
- The Nikon D60 or D40X plus all-in-one 18-200mm VR lens is a great system for active travelers, sufficiently lightweight to carry all day in my chest bag.
- D60 or D40X camera body weighs 18 ounces (including battery & strap).
- The Nikkor AF-S DX VR 18-200mm 3.5-5.6G IF-ED lens weighs 22 ounces with cap and hood (released in 2006, adopted by me in 2008). Its wonderful new VR (Vibration Reduction) feature stabilizes the sharpness of hand-held shots by up to 4 stops of shutter speed − remarkably unchaining travel photographers from the constraints of a tripod!
- This D60 or D40X with 18-200mm lens system is comparable to Canon Rebel XSi with Canon 18-200mm IS.
- The D60 thankfully introduces a good sensor dust-removal system, plus VR kit lenses. (The previous Nikon D40X model, which I used from May 2007 to August 2008, required tedious dust spot corrections, but nowhere near as bad as slide film).
- The D60 introduces Active D-Lighting to attractively lighten shadow detail in JPEG shots, but Active D-Lighting doesn’t affect my raw shots — RAW gives superior editing leeway, so I generally avoid shooting JPEG (now that memory cards are getting cheaper than in the near past, allowing plenty of room for the larger RAW files).
- D60/D40X sensor captures 10 megapixels = 3872 x 2592 pixels, making good prints to 23 by 30 inches or larger. Excellent quality to ISO 800, and ISO 1600 is usable for smaller prints. Same image quality as the higher priced Nikon D200. CCD sensor size is 23.6 x 15.8 mm (six times the light gathering area of the sensor in my earlier compact Canon Pro1).
- The Nikon D60/D40X has a bright 2.5 inch LCD and shoots a generous 300 to 420 images per charge (using a Digital Concepts 1200 mAh battery, at 40 to 70 degrees F, using the LCD briefly on most shots; most shots using VR and 10% using flash). The batteries last 2.5 times longer than Canon Pro1 batteries and weigh an ounce less per battery. Long battery life is important for trekking away from electricity such as in Nepal, where six batteries lasted for two weeks shooting 2800 images without recharging on the D40X.
- Adobe Lightroom version 1.1 introduced support for the Nikon D40X camera, and version 1.4 supported Nikon D60.
- 2008-09: my wife uses the shirt-pocket sized Canon SD700 IS (below), which serves as my backup that adds movies & sound recording.
Canon PowerShot SD700 IS Digital ELPH, ultra-subcompact digital camera (7 oz; Tom used October 2006−2007)
- This amazingly tiny and lightweight camera can be carried in your pocket, takes still shots with publication quality up to 12 by 16 inches, and serves as a main camera for my wife and backup camera for me.
- Features: 6 megapixels (2816 x 2112 pixels). Image-stabilized zoom lens 5.8-23.2 mm, f/2.8-5.5 (or 35-140 mm lens in 35mm-film-camera terms); 0.79-inch macro focus. Movies can be 15, 30 or 60 frames per second, with dynamic exposure and digital zoom as you shoot, which is better than the Pro1. Great DIGIC II processor. We bought the optional housing for shooting underwater.
- Disadvantages: No raw file mode. It has good exposure +/- compensation, but cannot set or view the F/stop aperture or shutter speed (except shutter speed thankfully displays live when the camera shake warning also displays).
- The SD700 was succeeded by the SD850. Excellent alternatives to the SD700 IS: Sony Cyber-shot DSC-N2; or Canon SD800 IS ELPH. Slightly larger, higher quality alternatives in 2007: Canon PowerShot A710 IS, or PowerShot G7. Upgrades released in 2008: G9, G10.
Canon PowerShot Pro1 compact digital camera (25 oz; Tom used August 2004 − March 2007)

- For its time, the Canon PowerShot Pro1 was a great all-in-one camera for traveling.
- Features: 8 megapixels = 3264 x 2448, makes good prints to 23 by 30 inches. Professional “L series” 7.2-50.8 mm zoom lens, with fast f/2.4-3.5 widest aperture, or 28-200 mm, in terms of 35mm-wide-film cameras (horizontal angle of view from 65.5 degrees wide, to 10.3 degrees at telephoto). Close macro focus to 1 inch (using 5 megapixel Super Macro, f/3.0 at 90 mm). The electronic viewfinder EVF is great when the LCD is hard to read in bright sunlight. High resolution Movies. JPEG images require little Photoshop touch up; and the raw format preserves superior image quality. Battery life is half of the earlier Canon G5, so I carry a few more batteries. CCD sensor 2/3 inch type (8.8 x 6.6 mm).
- Using the Pro1’s wide angle lens at maximum f/8, everything is in focus from 1.4 feet to infinity when you focus at 2.7 feet (the “hyperfocal point”; all objects at distances from half of the hyperfocal distance out to infinity will be acceptably sharp). Using the Pro1’s 50.8 mm telephoto at f/8, if you focus 132 feet away, then everything is in focus from 66 feet to infinity; and focusing the same telephoto at 20 feet, you get 6 feet of total depth of field from front to back.
- April 2005 upgrade: Canon Pro1 Firmware version 1.0.1.0 (free on Canon Support Web Site, released December 2004) doubles the shutter release speed, reducing shutter lag from about 0.6 to 0.3 seconds.
- But in 2007, the discontinued Canon Pro1 was outclassed by the more capable Fujifilm FinePix S9100, which is the same weight but physically larger.
Canon PowerShot SD500 Digital ELPH ultra-subcompact digital camera (7 oz; Tom used May 2005 − Sept 2006)
- This tiny and lightweight camera can be carried in a pocket, takes still shots with publication quality up to 12 by 16 inches, and served as a main camera for my wife and backup camera for me for 1.5 years.
- Features: 7 megapixels = 3072 x 2304 pixels. Zoom lens 7.7-23.1 mm, f/2.8-7.1 Wide, f/4.9-13.0 Telephoto (or 37-111 mm lens in 35mm-film-camera terms); 2-inch macro focus. Movies can be 15, 30 or 60 frames per second, and now with dynamic exposure and digital zoom as you shoot, which is better than my Pro1. Great DIGIC II processor.
- Drawbacks: No raw file mode. Has good exposure +/- compensation, but cannot set or view the F-stop aperture or shutter speed.
- To maximize depth of field, set the SD500 mode dial to Manual and toggle the Infinity button (until you see the mountain symbol). Using the SD500’s 7.7 mm (37 mm equivalent) wide angle lens at maximum f/7.1, everything is in focus from 2.3 feet to infinity when you focus at 4.6 feet (the “hyperfocal point”). At the 23.1 mm (111 mm equivalent) telephoto maximum f/13, everything is in focus from 11.5 feet to infinity when you focus at 23 feet.
- We bought the SD500 for $450 in May 2006, and sold it on e-Bay 1.5 years later. In October 2006, we upgraded to the well-reviewed Canon PowerShot SD700 IS ELPH above (which introduces excellent image stabilization in a longer zoom 35-140 mm f/2.8-5.5 lens, which helps compensate for the lower resolution of 6 megapixels; and shutter-button lag is now reduced to a very fast 0.1 to 0.3 seconds).
Film versus digital photography 2004-2009; and how to ensure digital longevity
FILM VERSUS DIGITAL (read my 2009 article).
While film can fade, high-quality digital image file formats should last perfectly into the future so long as you copy backups onto the latest storage media which are readable by up-to-date software.
To avoid unrecoverable exposure problems and posterization, always record 12-bit (or 14-bit) camera raw format files at shooting time to create digital archive files that have 16 (or 64) times the tonal editing headroom compared to JPEG (which has only 8 bits per pixel per red, green, or blue color channel).
If your editing software ever threatens to evolve beyond compatibility with older raw files (which are proprietary to each camera), first convert to a modern “universal” raw format such as Adobe Digital Negative, DNG files, to ensure future compatibility. As of 2015, Adobe Lightroom version 6 still handles my oldest raw files from Canon Powershot G5 camera of 2003, and I haven’t yet seen the need to convert old files to DNG. For secure backup of my Lightroom edits, I like “Automatically write changes into XMP” (Lightroom > Edit > Catalog Settings > Metadata), in case the Lightroom catalog ever becomes corrupted and must be restored by re-importing raw image files + sidecar XMP files.
Canon PowerShot G5 compact digital camera (19 oz) + telephoto lens (9 oz) (Tom used 2003−2004)

The Canon PowerShot G5 convinced me to stop shooting film! The G5 was half the size and weight of my earlier Nikon N70 SLR outfit (below), yet had a brighter lens, and rivaled the quality I got from scanning film using the Nikon LS-2000 film scanner (which was later superseded by better scanners). G5 Features: 5 megapixels = 2592 x 1944, 35-140 mm zoom (equivalent), f/2.0-3.0, + fixed 245 mm or 1.75x attachment lens. Its great flip-out-and-twist LCD became a critical feature that I never knew I needed before, for macro, wildlife, and people shots.
Fujichrome Velvia 100F 35mm color slide film (Tom used 2004)
is more realistic and not quite as vivid as Velvia 50, but has twice the speed, and could have become my new mainstay film, except for the superiority of a digital camera for my travel and nature photography.
Kodak Ektachrome 100VS 35mm color slide film (Tom used 2001−03)
I was very happy with this vivid film when I need one stop faster than Fuji Velvia. (I disliked the flat colors of Fuji Provia 100 or 100F.)
Epson Stylus Photo 1270 Printer (Tom used 2000−04)
made wonderful prints up to 12×44 inches, rated at 25-year longevity on special Epson papers (when mounted behind glass). 6-color high quality ink jet printer. My home prints on the Epson 1270 now exceeded the quality of professional chemical silver-based prints. (The 1270’s successor was the similar Model 1280; and after 2004, nicer 7-color printers became available such as the excellent Epson Stylus Photo 2200 above, and 4000.)
Fujichrome Velvia 50 ASA 35mm color slide film (Tom used 1999−2004)
This classic film became my new mainstay, until I switched to a digital camera in 2004.

Nikon N70 SLR 35mm-film camera + 2 lenses = 54 ounces (Tom used 1998−2004)
Doubled light gathering power and gained a nice built-in flash, at the cost of slightly more bulk and weight. Fully automatic + manual. In April 1999, I upgraded lenses to: Sigma 28-105 mm f/2.8-4 Aspherical Zoom; and Sigma 70-210 mm f/3.5-4.5 APO Telephoto Zoom Macro (2:1 magnification). Nikon N70 was released in 1996.
Gitzo “Weekend Compact Performance” tripod (Tom used 1998−2004)
2.9 pounds with lightweight ballhead, plus Kirk quick release plate. When the camera is not attached, the Kirk plate can lose its release knob unless you screw it all the way down, which partly defeats the quick release purpose. The screw-locking legs on this Gitzo model are very slow to set up and take down, and the small ball head constantly came unscrewed (a design flaw). I upgraded to a lighter, faster & cheaper yet equally sturdy tripod further above.
Fujichrome 100 Sensia I & II film (Tom used 1992−1998)
became my new mainstay: fast & sharp with adequate color.
Film experiment 1988-2000: I occasionally used Kodachrome 200 film
but I was usually unhappy with the grainy results.
Film experiment 1986-92: I occasionally used Kodachrome 64 film
which is faster than Kodachrome 25, but color is not as vivid.
Film classic 1978-92: The great Kodachrome 25 film
was my longtime mainstay film with good sharp results. Even though it is one of the longest-lasting films, some of my Kodachrome 25 slide images are fading after 25 years. Ektachrome fades quicker than Kodachrome.
Classic camera: Olympus OM-1N SLR 35mm-film camera + 2 lenses = 48 ounces (Tom used 1978−97)

Trusty and rugged. Fully manual camera. Attachable flash. I started with fixed 50 mm and 135 mm Zuiko lenses, then upgraded to a Tamron 28-70 mm f/4 zoom, and a Sigma UC II 70-210mm, f/4-5.6, 1:4.7 macro, telephoto zoom lens. From 1978 to 1997, I used lightweight SLIK 500G and other tripods for travel. The OM-1 can take 8-hour night sky star-trail photographs, which can require special battery supplements on modern battery-intensive cameras, such as the Nikon N70 film camera, and especially digital cameras.
- In 2012, Olympus revived the OM concept with the following impressive, super-sharp, digital upgrade:
- Olympus OM-D E-M5 Micro Four Thirds Digital Camera
- with splash-proof M.ZUIKO DIGITAL ED 12-50mm f/3.5-6.3 EZ lens
- Olympus OM-D E-M5 Micro Four Thirds Digital Camera
- In 2022, Olympus rebranded as OM System.
Terminology and metric conversions
- oz = ounces. Above camera weights in ounces (oz) include battery and memory card.
- g = grams. Multiple ounces by 28.35 to get grams.
- sec = second.
- mm = millimeters. A centimeter (cm) equals 10 millimeters. Multiply centimeters (cm) by 0.3937 to get inches.
- ILC = Interchangeable Lens Compact = “midsize mirrorless camera” term used above
- DSLR = Digital Single Lens Reflex = a traditional camera where an optical viewfinder uses a mirror to see through the interchangeable lens.
- EVF = Electronic Viewfinder.
- LCD = Liquid Crystal Display.
- OLED (Organic Light-Emitting Diode) beats an LCD in dynamic range from darkest to brightest and consumes less power.
- LPH or LPPH = resolvable lines per picture height = the best empirical measure of real resolution of a camera’s sensor for a given lens (independent of pixel pitch or megapixel count). A camera with higher LPH can make sharper large prints. Look up cameras on dpreview.com to find absolute vertical LPH judged by photographing a PIMA/ISO 12233 camera resolution test chart under standardized lighting conditions. Note which lens, settings, and camera body was used in each test, and compare with others within the same web site.
- “equivalent“ lens = To compare lenses on cameras having different sensor sizes, equiv or equivalent lens refers to what would be the lens focal length (measured in mm or millimeters) that would give the same angle of view on a “full frame” 35mm-size sensor (or 35mm film camera, using 135 film cartridge).
- Compared lenses are “equivalent” only in terms of angle of view. (To determine sharpness or quality, read lens reviews which analyze at 100% pixel views.)
- “Crop factor” = how many times smaller is the diagonal measurement of a small sensor than a “full frame” 35-mm size sensor. For example, the 1.5x crop factor for Nikon DX format (APS-C size sensor) makes a lens labeled 18-200mm to be equivalent in angle of view to a 27-300mm focal length lens used on a 35mm film camera. The 2x crop factor for Micro Four Thirds sensors makes a lens labeled 14-140mm to be equivalent in angle of view to a 28-280mm lens used on a 35mm film camera.
- Superzoom lenses
- In 2013, superzoom often refers to lenses of about 15x zoom range or larger. Steady quality improvements in the resolving power of sensors has made possible superzoom cameras in ever smaller sizes. As superzoom range increases, laws of physics require lenses to focus upon smaller sensors (light detectors) or else to increase lens size. For a given level (most recent year) of technological advancement, a camera with physically larger sensor (bigger light detecting area) should capture better quality for a given zoom lens range.
- “10x zoom” = zoom lens telephoto divided by wide angle focal length. For example, a 14-140mm focal length zoom has a 10x zoom range (140 divided by 14). An 18-200mm zoom has an 11x zoom range (200 divided by 18).
- “equivalent” F-stop = refers to the F-stop (F-number) on a full-frame-sensor camera which has the same hole diameter as the F-stop of the camera lens being compared. The concept of “equivalent” F-stop lets you compare capabilities for creating shallow depth of field on cameras with different-size sensors. Smaller-sensor cameras use shorter focal lengths for the same field of view, so at a given F-stop they have a smaller physical aperture size, meaning more depth of field (with less blur in front of and behind the focused subject). Formula: F Number (or Relative Aperture) = actual focal length of lens divided by diameter of the entrance pupil.
Support Tom’s work — buy any number of items at any Amazon.com link here on PhotoSeek.